|
Tech Saturday Forum
|
Current Topics & Highlights From
Saturdays @ The W2MMD Clubhouse

|
Tech Saturday Forum : August 10, 2024
|
Tech Saturday Forum : July 6, 2024
No set topic, just an open Saturday
Tech Saturday Forum : June 8, 2024 - First Class
Tech Saturday Forum : June 15, 2024 - Second Class

|
|
Registration for this event is required so we can have
adequate supplies & equipment available.
A $15.00 fee will be charged for the parts.
Please contact Chris Prioli, AD2CS at [email protected].
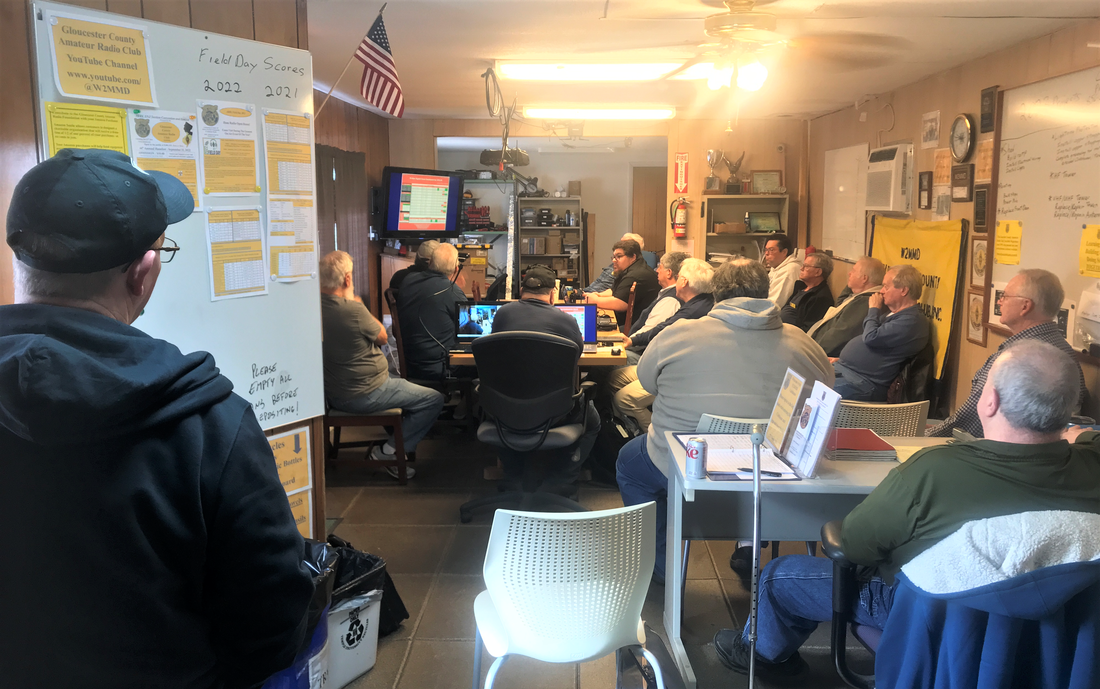
Tech Saturday Forum : May 4, 2024
|
|
Sheldon Parker, K2MEN Comments :
"Parking was at a premium this morning for the monthly Tech Saturday event. What’s going on? Turns out Chris Prioli, AD2CS, was leading another class project which attracted so many participants I couldn’t find a seat! WOW! What a nice event. Coffee, cookies, and a bunch of hams doing one of the things we do best. Building and learning. It’s such a pleasure to witness Club growth and participation in events like this. An unrelated event even spilled outside despite the threat of rain. Let’s keep it going!"
"Parking was at a premium this morning for the monthly Tech Saturday event. What’s going on? Turns out Chris Prioli, AD2CS, was leading another class project which attracted so many participants I couldn’t find a seat! WOW! What a nice event. Coffee, cookies, and a bunch of hams doing one of the things we do best. Building and learning. It’s such a pleasure to witness Club growth and participation in events like this. An unrelated event even spilled outside despite the threat of rain. Let’s keep it going!"
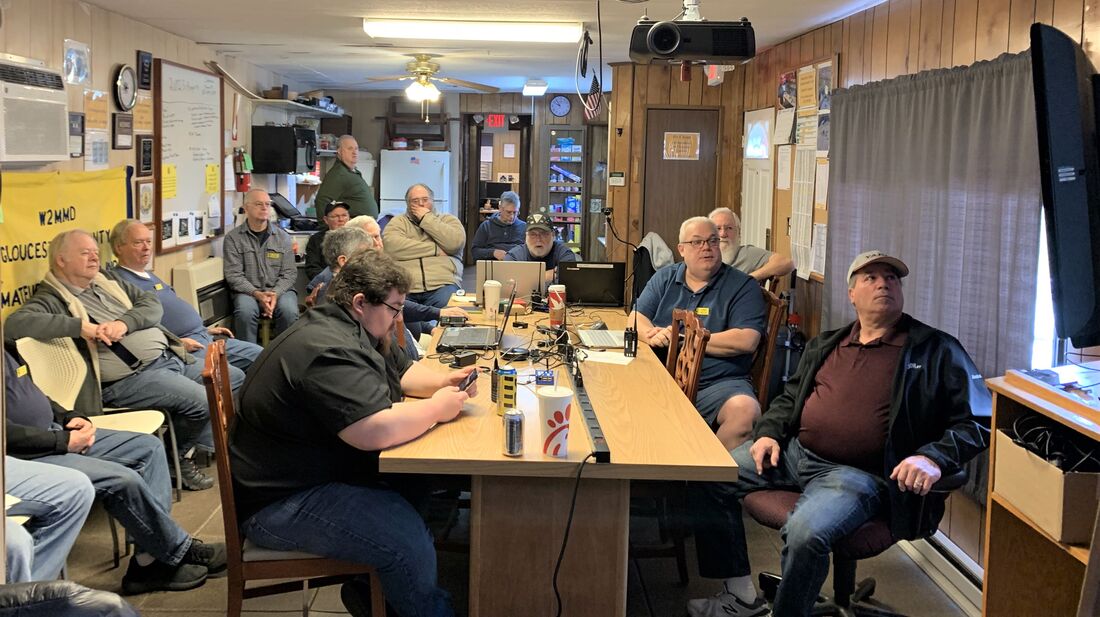
Tech Saturday Forum : April 6, 2024
Forum Topic :
John Zaruba Jr, K2ZA - POTA Hands-On!
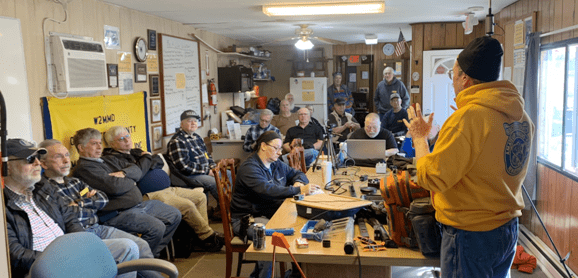
Another Tech Saturday full house!
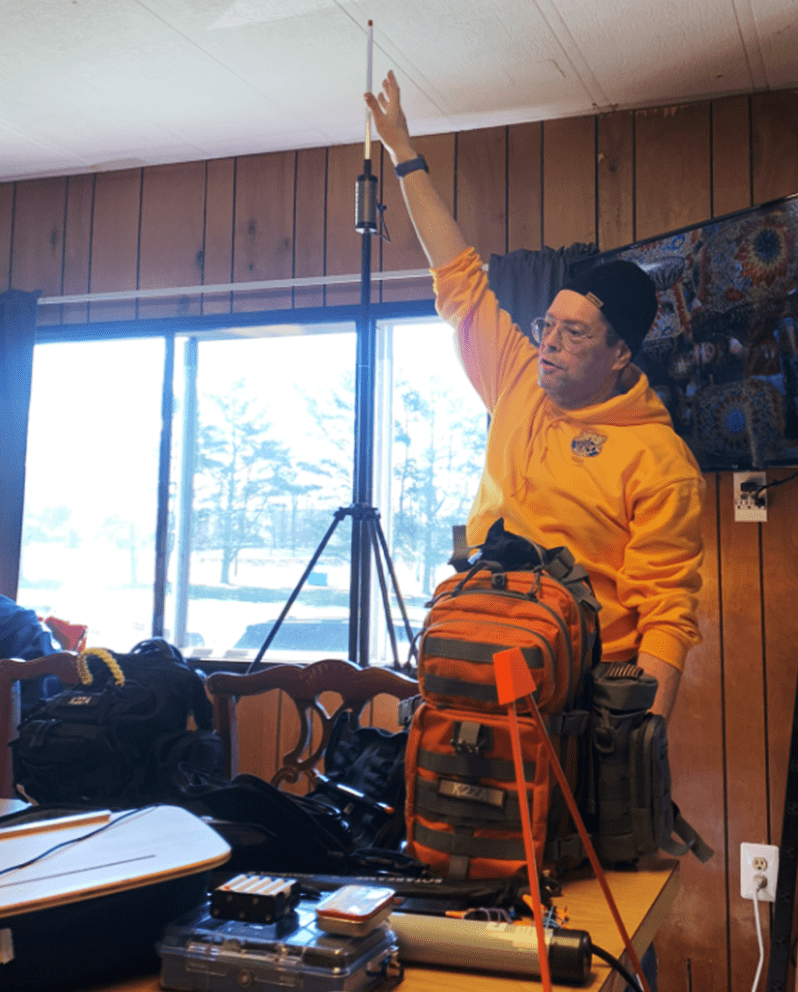
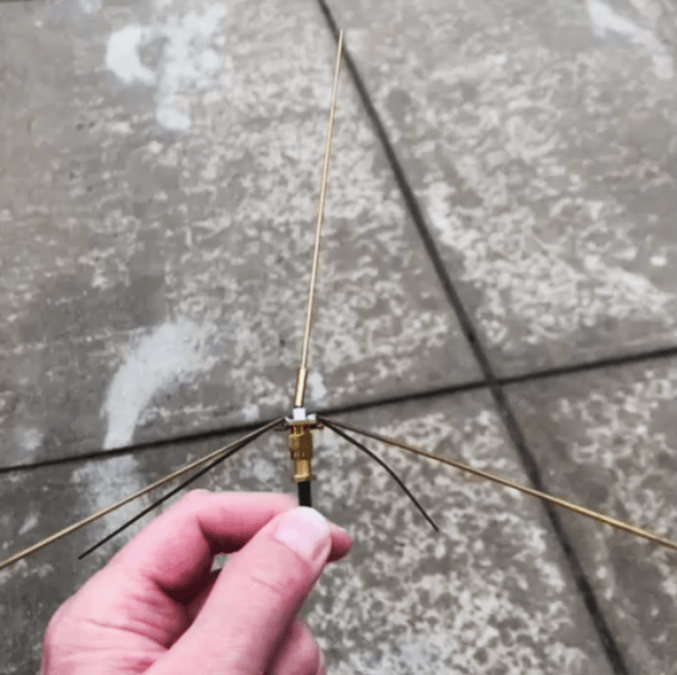
John Zaruba Jr, K2ZA, demonstrating his modified Buddy Pole antenna
April 6, 2024 Tech Saturday Forum Reaches New Heights!
By Jon Pearce, WB2MNF
Once again John Zaruba Jr, K2ZA, dazzled GCARC members with his second POTA presentation, this time hands-on with the various configurations of equipment that he uses for operating in different environments. With his seemingly-endless knowledge of ham hardware of various types he had prepared several different station configurations depending on the operating environment, type of access to the location and whether operating CW, phone, or data modes. After the indoor session participants could check out John’s configuration at his car.
After the session many attendees checked out the HF and VHF rooms, worked on a variety of projects underway at the Clubhouse or picked up some assistance or operating tips for others present.
Tech Saturday Forums represents yet another opportunity for Club members to :
“Learn Stuff - Build Stuff - Do Stuff - Together!”
73 de Jon WB2MNF
Tech Saturday Forum : March 9, 2024
Forum Topic :
Direction Finding Workshop
In Preparation for the March 16, 2024
30th Anniversary Fox Hunt
Tech Saturday Forum : February 10, 2024
Forum Topic : Len Rust, W2LJR : Introduction To VOIP
“Voice Over IP” Tech Saturday Forum - February 10, 2023
By Jon Pearce, WB2MNF
Almost a dozen members gathered at the W2MMD Clubhouse on Saturday, February 10, 2024 for a fascinating presentation by Len Rust W2LJR on Voice Over IP technology. Len has worked in this industry for decades and presented an overview of the history of telephone long distance communication, beginning with leased lines and continuing into current technology. He also set up a small self-contained VoIP network on the Clubhouse table and demonstrated how this technology is implemented in a variety of different settings. Notably, he showed how a call to the Clubhouse telephone number could be answered automatically and routed to different extension units, which created some interesting suggestions from members on handling the different types of calls that come into the Clubhouse. Len is a frequent presenter at Tech Saturday Forums and always gives excellent presentations.
Following Len’s presentation an ad-hoc group gathered to discuss issues related to the “Meshtastic” project in which many Club members are participating. As described on the Meshtastic webpage, Meshtastic provides an inexpensive way for members to get involved in mesh networking and a wide variety of related topics. As usual, multiple conversations followed, and the HF and satellite stations are generally available for operation during these times.
Tech Saturday is a great event at which to get together with other members in an informal setting and to collaborate and learn about ham radio topics.
Tech Saturday Forum : January 6, 2024
Forum Topic :
Chris Prioli, AD2CS : Repairing The Yaesu Satellite Rotator
Tech Saturday Forum : December 9, 2023
Jon Pearce, WB2MNF :
Raspberry Pi - From Zero To HamClock
“Tech Saturday - Hamclock Edition”
By Jon Pearce, WB2MNF
The December 9, 2023 Tech Saturday Forum session was focused on getting started with the Raspberry Pi series of small computers and getting the “Hamclock” application running. Attendees had a broad range of experience with these devices from complete beginners to relative experts so a wealth of assistance was available at all levels to everyone. The session reviewed the different models of the Pi and the broad range of applications, including many for ham radio, and described the process for installing different types of software.
Interest was sufficient that the next several Monday Night GCARC TechNet ZOOM Forum sessions will cover interfacing these and other computers to ham radio equipment. This topic seems to have the potential for a subgroup of users to create some type of informal collaboration group, so let me know if you’re interested and we’ll figure out a forum for supporting that effort.
---------------------------------------------------------------------------------------------------------------
HamClock (https://www.clearskyinstitute.com/ham/HamClock) is a program that displays various information such as time, date, location, weather, sun and moon data, propagation information, and more. We will guide you through the steps of installing the Raspberry Pi operating system, flashing the SD card, entering basic commands, and installing the HamClock program.
The December 9th Tech Saturday Forum is "Raspberry Pi - From Zero to HamClock" - a session to show how to start with a bare Raspberry Pi computer and empty SD card and end up running the "HamClock" application. If you're interested in finding out what you can do with one of these small but powerful computers but haven't yet delved into them this is the session for you. It will be a fun and easy way to get started with this versatile device.
Below is the list of materials that you'll need for that session.
The Raspberry Pi used can be any of the recent models from a Pi 3 through a Pi 5. Some of these are not available but one good option is the Pi 4 (4 GB) available from Amazon for $61 at : https://bit.ly/47MBskw
Or a Pi 4 (2 GB) from Adafruit for $45 at : https://www.adafruit.com/product/4292
Both the 2 GB or the 4 GB can run the Hamclock application, but the 2 GB unit may not run other more intensive applications. These run on a USB-C power adapter and use mini-HDMI cables so be sure that you have them.
Here's the list of stuff that you'll need to have and load onto your PC :
Download and install on your laptop :
Feel free to start experimenting with this stuff when you get it, but we'll be starting from scratch at the Tech Saturday Forum, imaging the memory card and loading the HamClock application. We'll also review the process to connect to these devices from a PC using PuTTY for a command-line interface or VNC for a GIU interface.
These devices are amazingly use for a wide variety of applications so feel free to attend even if you don't want to build a HamClock. More info will be available closer to the event date.
---------------------------------------------------------------------------------------------------------------
November 26, 2023 : Here's some additional information about the Raspberry Pi/HamClock session and the project :
If you don't have a Pi but would like to play along I have a few extras that I can bring. If so, install the Pi imager, Putty and VNC software on your laptop.
Feel free to email with any questions.
Jon Pearce, WB2MNF
---------------------------------------------------------------------------------------------------------
HamClock For The December 9th Tech Saturday Forum
By Vinnie Sallustio, N4NYY
In addition to what Jon said above, I made a video about the HamClock, if anyone wants to build one on Tech Saturday. As Jon said, the HamClock is just one app for the Pi.
The HamClock I made is small (7"), and the combined cost of the required parts, were about $160 or so. However, if you have enough space and already have a PC display monitor, you can run it on that, as Jon set one up in the Clubhouse on a 22" display.
Here is the video link for the HamClock I built :
https://youtu.be/PwwNhzhGjTA?si=zuJA_nDsAdxWgkTO
It is not an instructional video, but an explanation of what it is. There are a lot of instructional videos on building HamClock.
If you are interested in the portable one that I have, let me know and I will send a parts list with links.
If you want to build one on a regular computer display, you will likely only need the Raspberry Pi, case, and power supply. Much cheaper than the $160 portable.
I am not sure yet I will be attending the December 9th Tech Saturday, as I am a serious fisherman and it is Blackfish season. But I can leave my HamClock with Jon for assistance.
The December 9th Tech Saturday Forum is "Raspberry Pi - From Zero to HamClock" - a session to show how to start with a bare Raspberry Pi computer and empty SD card and end up running the "HamClock" application. If you're interested in finding out what you can do with one of these small but powerful computers but haven't yet delved into them this is the session for you. It will be a fun and easy way to get started with this versatile device.
Below is the list of materials that you'll need for that session.
The Raspberry Pi used can be any of the recent models from a Pi 3 through a Pi 5. Some of these are not available but one good option is the Pi 4 (4 GB) available from Amazon for $61 at : https://bit.ly/47MBskw
Or a Pi 4 (2 GB) from Adafruit for $45 at : https://www.adafruit.com/product/4292
Both the 2 GB or the 4 GB can run the Hamclock application, but the 2 GB unit may not run other more intensive applications. These run on a USB-C power adapter and use mini-HDMI cables so be sure that you have them.
Here's the list of stuff that you'll need to have and load onto your PC :
- A USB micro-SD card reader to set up the card, like this one, in addition to the Pi :
- A micro-SD card - max 32 GB like these : https://bit.ly/49Q7Iov
Download and install on your laptop :
- VNC for remote desktop to the Pi : https://bit.ly/3sDjgeh
- PuTTY for command line connection to the Pi : https://www.putty.org
- Raspberry Pi imager to put the operating system onto the SD card : https://bit.ly/3MXpvAa
Feel free to start experimenting with this stuff when you get it, but we'll be starting from scratch at the Tech Saturday Forum, imaging the memory card and loading the HamClock application. We'll also review the process to connect to these devices from a PC using PuTTY for a command-line interface or VNC for a GIU interface.
These devices are amazingly use for a wide variety of applications so feel free to attend even if you don't want to build a HamClock. More info will be available closer to the event date.
---------------------------------------------------------------------------------------------------------------
November 26, 2023 : Here's some additional information about the Raspberry Pi/HamClock session and the project :
- You'll need a USB power cable for your respective Pi - micro-USB for a Pi 3 or USB-C for a Pi 4. For the Tech Saturday session I'll have a few multi-output USB power blocks available to plug into, but when you get home you'll need one to power the Pi. For HamClock you don't need a lot of power but if you're going to use the Pi for high-CPU activities you may need a 3 amp supply or greater. In particular an SDR-based application would pull a lot of power, both to run the CPU and to power the SDR.
- You don't need a case and/or cooling fan for this project although it's a good idea to have one to protect and cool it. Again, the need for cooling depends on the CPU load of the application.
- You DO need heat sinks on the CPU and graphics chip. Some Pi's come with them, others may not. Pi cases come with heat sinks so install the heat sink even if you don't put on the case.
- If you're planning to make HamClock a permanent addition to your shack you'll obviously need a monitor devoted to it, which means that you'll need a HDMI cable from the Pi to the monitor. Note that the Pi 4 uses a mini-HDMI connector and can handle two different monitors (needing 2 different cables), whereas the Pi 3 uses a single full-sized connector. I haven't used the 2-monitor setup with a Pi 4 and don't know much about it.
- If you're planning to use the Pi for other applications and don't need a permanent monitor you can run it "headless" without a monitor, keyboard and mouse by connecting using the VNC or Putty applications. That's how we do most of the stuff at the Clubhouse. It's also how we'll be installing and setting up the software.
If you don't have a Pi but would like to play along I have a few extras that I can bring. If so, install the Pi imager, Putty and VNC software on your laptop.
Feel free to email with any questions.
Jon Pearce, WB2MNF
---------------------------------------------------------------------------------------------------------
HamClock For The December 9th Tech Saturday Forum
By Vinnie Sallustio, N4NYY
In addition to what Jon said above, I made a video about the HamClock, if anyone wants to build one on Tech Saturday. As Jon said, the HamClock is just one app for the Pi.
The HamClock I made is small (7"), and the combined cost of the required parts, were about $160 or so. However, if you have enough space and already have a PC display monitor, you can run it on that, as Jon set one up in the Clubhouse on a 22" display.
Here is the video link for the HamClock I built :
https://youtu.be/PwwNhzhGjTA?si=zuJA_nDsAdxWgkTO
It is not an instructional video, but an explanation of what it is. There are a lot of instructional videos on building HamClock.
If you are interested in the portable one that I have, let me know and I will send a parts list with links.
If you want to build one on a regular computer display, you will likely only need the Raspberry Pi, case, and power supply. Much cheaper than the $160 portable.
I am not sure yet I will be attending the December 9th Tech Saturday, as I am a serious fisherman and it is Blackfish season. But I can leave my HamClock with Jon for assistance.
Q & A Session About All Things Ham Radio and Socializing
The HF Station Will Be Available For Local Operation
Tech Saturday Forum events are designed to be informal and collaborative group learning experiences, and we're always looking for interesting topics to cover at these sessions. If you have a particular interest in learning or presenting on a particular topic please let me know and we'll figure out a way to do it.
The goal of Tech Saturday events is to bring together hams with various levels of experience and expertise on a particular issue and to allow everyone to contribute that expertise for the benefit of the overall group. Previous Tech Saturday events have focused on topics like Nano-VNA test equipment.
Tech Saturday Forum sessions are held at the W2MMD Clubhouse on the first Saturday of the month following the Wednesday Night General Membership Meeting and are designed to be hands-on collaborative events focused on using the Clubhouse resources to demonstrate various aspects of Amateur Radio and related technical areas. Previous sessions have covered USB software-defined radios, Raspberry Pi and Arduino devices, satellite operations and other similar topics.
We would like to invite all of our new members as well as our veteran members to our Tech Saturday Forums to help answer any questions and discuss any and all issues the new members have come across as they progress through the Amateur Radio Experience.
The Discussion Theme is a QSO starting point - a way to initiate a conversation. All Tech Saturdays are an open QSO of all subjects of Amateur Radio interest.
All questions are welcome as well as a venue for hams to show off their latest ham radio projects or gadgets. Have a problem programming that HT, we can help! Not sure what radio or antenna to buy, we can help!
All Club Members who would like Clubhouse access to use its radio equipment would have to have some brief “Elmering” on the Clubhouse rules, such as using the alarm system, the A/C and heaters, the antenna system, and the radio equipment.
All are welcome - Hams and Non-Hams - Club Members and Non-Club Members.
Tech Saturday Forum : November 4, 2023
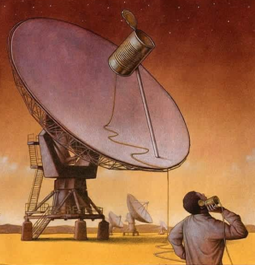
Mike Thompson, KG4JYA : Radio Astronomy Lab
|
Amateur Radio is not just for communication. You can learn a great deal about the Universe that surrounds us by monitoring natural radio sources.
Please join us at the November 1st General Membership meeting and again, with more detail, on the following Tech Saturday Forum on November 4th, where Club member Mike Thompson, KG4JYA, will attempt to define Radio Astronomy and relate the significant contributions it has made to science. He will then share some of his own personal experiences viewing the Universe in a very different light. See you there! |
Tech Saturday Forum - November 4, 2023
By Ron Block, NR2B
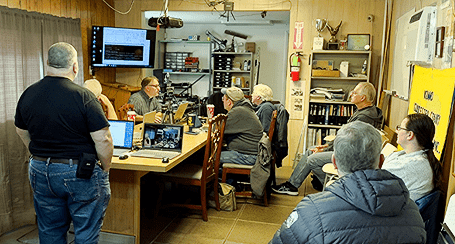
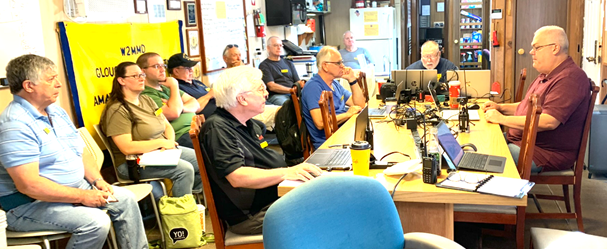
Amateur Radio is not just for two-way communication. You can learn a great deal about our local universe by monitoring naturally occurring radio sources. Pictured below is Mike Thompson, KG4JYA, with 15 Club members at the W2MMD Clubhouse on the November 4, 2023 Tech Saturday Forum leading a discussion on his decades long experience with Radio Astronomy. Mike began by summarizing his presentation for those who could not attend the November 1, 2023 General Membership Meeting and then continued by sharing some of his own personal experiences in capturing samples of celestial audio and low frequency RF energy.
Mike explained that the signals coming from space are always very weak, except for the Sun whose radio emissions are very strong due to proximity; in fact, so weak that it is difficult to differentiate them from the background noise. This requires the use of special receivers developed for radio astronomy and mandates that antennas be large as possible in order to increase the received signal strength. Man-made noise is a ubiquitous issue and has driven both the technology and geographical aspects of this part of our hobby.
This sparsely populated corner of ham radio is rewarding and has consistently contributed to the knowledge of our universe.
By Ron Block, NR2B
Amateur Radio is not just for two-way communication. You can learn a great deal about our local universe by monitoring naturally occurring radio sources. Pictured below is Mike Thompson, KG4JYA, with 15 Club members at the W2MMD Clubhouse on the November 4, 2023 Tech Saturday Forum leading a discussion on his decades long experience with Radio Astronomy. Mike began by summarizing his presentation for those who could not attend the November 1, 2023 General Membership Meeting and then continued by sharing some of his own personal experiences in capturing samples of celestial audio and low frequency RF energy.
Mike explained that the signals coming from space are always very weak, except for the Sun whose radio emissions are very strong due to proximity; in fact, so weak that it is difficult to differentiate them from the background noise. This requires the use of special receivers developed for radio astronomy and mandates that antennas be large as possible in order to increase the received signal strength. Man-made noise is a ubiquitous issue and has driven both the technology and geographical aspects of this part of our hobby.
This sparsely populated corner of ham radio is rewarding and has consistently contributed to the knowledge of our universe.
Tech Saturday Forum : October 7, 2023
Jim Wright, N2GXJ : Antenna Modeling & Simulation
Try antenna modeling at the October 7, 2023 Tech Saturday Forum!
Bring your laptop to the October 7, 2023 Tech Saturday Forum, and together we’ll go through the basics of setting up and running a tutorial using the amazing free antenna modeling software 4NEC2. Want to download the software in advance? Go to : https://www.qsl.net/4nec2 . The latest version at time of this writing is 5.9.3 https://qsl.net/4nec2/4nec2.zip .
What is 4NEC2? It is a tool for designing 2D and 3D antennas and modeling their near-field/far-field radiation patterns. From end-feds to dipoles to inverted V to beams and more, for any frequencies from kHz to GHz, not just Ham frequencies, and with lots of example to tweak and copy from, this free NEC implementation for Microsoft Windows is a great tool for any ham to have.
Want to see some of the things it can do? Here’s a favorite : https://www.qsl.net/kk4obi/index.html . See what KK4OBI has done using 4NEC2 to answer the question “what happens when you bend the ends of a half wave dipole?”. From horizontal dipoles to vertical dipoles to off center fed dipoles to end-fed half waves, he examines them all. It will amaze you. I think you’ll enjoy!
Then hope to see you out at Tech Saturday with your laptop on October 7th!
Tech Saturday Forum : September 9, 2023
Len Rust, W2LJR : DMR Techniques You May Not Know
“DMR Topics” - Tech Saturday Forum, September 9, 2023
By Jon Pearce, WB2MNF
About 20 GCARC members gathered at the W2MMD Clubhouse on Saturday, September 9th for Len Rust W2LJR's presentation on advanced DMR radio techniques. Len covered the process used to make “private calls” to a particular station on the same DMR network without needing to know the repeater or hotspot at which the distant station was located. He also covered SMS messaging, APRS transmission and receiving, and the proper setup to use the local Interstate Repeater Service (http://www.interstatedmr.com) DMR repeaters. DMR radios have extensive capabilities that are unfamiliar to many users, and participants left with a far greater understanding of these new features. As usual, multiple conversations followed, and the HF and satellite stations are generally available for operation during these times. Tech Saturday is a great event at which to get together with other members in an informal setting and to collaborate and learn about ham radio topics.
Tech Saturday Forum : August 5, 2023
Tony Starr, K3TS : Mobile Amateur Radio Installations
Show & Tell
“Goin’ Mobile” - Tech Saturday Forum : August 5, 2023
By Jon Pearce, WB2MNF
On Saturday, August 5, 2023, 15 Club members gathered at the W2MMD Clubhouse to see Tony Starr K3TS’s HF mobile radio setup. Tony had given a presentation about his installation on Wednesday night, and now he demonstrated it in person. He explained how he installed the radio, mounted the antenna, and solved various noise problems. Lee Marino N2LAM also shared his compact installation with a self-tuning HF antenna. Tony helped other members with their mobile installation questions, such as how to deal with noise on HF and VHF FM bands, and how to connect DC power to the radio. Many of the attendees were new licensees who wanted to learn how to put rigs in their cars, so they found the session very useful.
Some members stopped by the VHF room after the session to watch some satellite passes. Chris AD2CS helped others with their DMR radio issues or showed them how to use the HF station. Tech Saturday Forum is a great time to learn by doing or get technical help with Amateur Radio.
Tech Saturday Forum : May 6, 2023
Chris Prioli, AD2CS : CHIRP Radio Programming
- For those experienced Fox hunters in the Club who may wish to fine-tune your equipment setup...
- For those newbie Fox hunters in the Club who may wish to get in some testing and practice time...
- For those Fox hunt Elmers who may want to take someone under your wing and get them prepared...
The Fox will be available and operating at the Clubhouse from about 1030 Hours until Noon on Saturday, immediately following the base Tech Saturday Forum presentation.
Come on out and get in some practice time with your radio and antenna and get yourself prepared for the real event on Sunday!
At May 2023 Tech Saturday Forum, the topic will be about radio programming and the CHIRP utility software, with some side coverage of other programming tools. If you have a radio that needs to be programmed, let me know and we will find a way to make it a part of the presentation. If you have a radio that uses proprietary software or the RT Software utility and cable, let me know that as well and we will figure out a plan there. Finally, if your radio requires a unique or specialized programming cable, make sure that you have the cable available if you want that radio programmed.
I am looking to program as many different radios as we can, so as to give the widest training and demonstration possible. Remember that we do have some universal and/or multi-radio cable sets available at the Clubhouse, which will cover quite a few of the popular radios. However, we do not yet have every radio covered, so we may need you to bring your programming cable. The same thing applies to any custom or proprietary programming software.
Please let me know what you want or need to do so that I can include you in the presentation. [email protected]
Tech Saturday Continues To Highlight New Technologies
By Jon Pearce, WB2MNF
The May 6, 2023 Tech Saturday event started with Chris Prioli AD2CS’s presentation on programming radios with CHIRP, a widely-used program that runs on Windows and Linux platforms, including the Raspberry Pi. CHIRP is unique in that it’s not tied to a particular type of radio as the RT Systems and manufacturer-based programs are. Instead it can load a basic set of frequency and operating data into multiple types of radios from a single data file. Since many hams have more than one type of HT (come on – you don’t ONLY have a Baofeng, do you???) using CHIRP can save time and money in creating a common operating platform across different radios.
Following Chris’ session, Jim Wright N2GXJ showed how to hunt the “Fox” using directional antennas and various techniques. This was in preparation for the Fox Hunt the following day in which participants were challenged to find the hidden transmitter “Fox” that had been artfully hidden by Chris AD2CS.
Tech Saturdays always provide a forum for exchange of many ideas among participants, often facilitated by the W2MMD Clubhouse resources. The HF station is available for operation and satellite passes often occur during those hours. Many different projects are underway with opportunities for ad-hoc discussions and learning and cooperation opportunities.
The June 10, 2023 Tech Saturday Forum session will cover the construction and operation of “hotspots”, which are devices using Raspberry Pi computers with RF add-on decks to allow communication between distant users through an internet connection. These devices support DMR, Yaesu System Fusion and other protocols.
Tech Saturday Forum is always the Saturday following the General Membership Meeting. The June meeting occurs on June 10 at the W2MMD Clubhouse starting at 9 AM.
Tech Saturday Forum : April 8, 2023
John Zaruba Jr, K2ZA : Introduction To Yaesu System Fusion
Equipment, Software, and How To Use It!
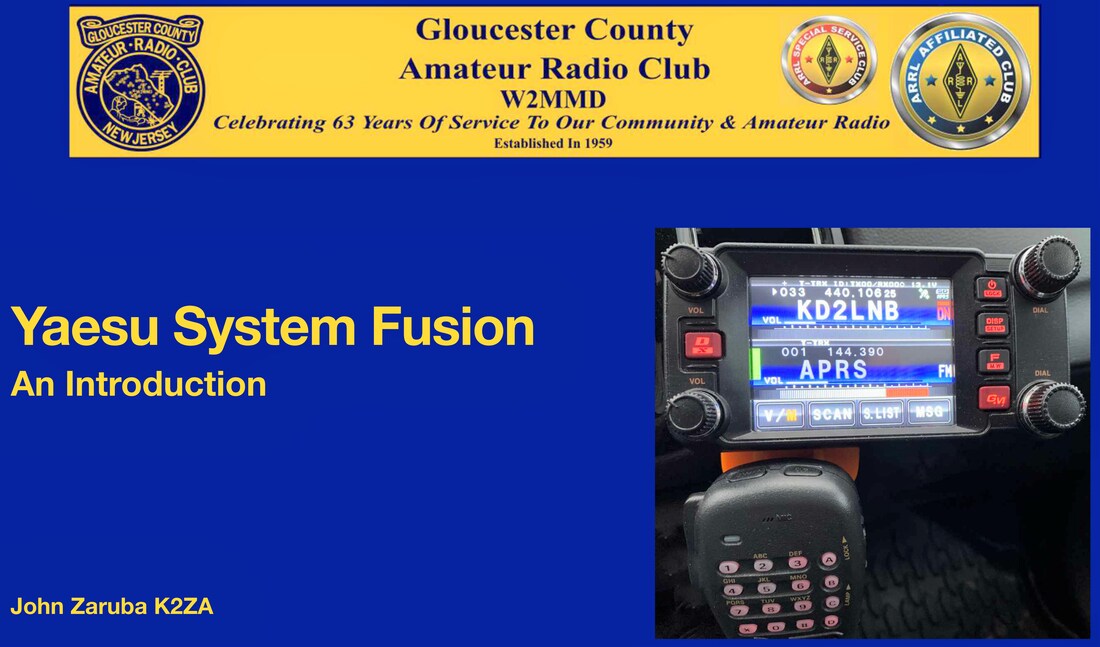
K2ZA Introduction To Yaesu System Fusion.PDF
Yaesu System Fusion and Wires-X at Tech Saturday
By Jon Pearce, WB2MNF
Tech Saturday continued to fill the Clubhouse in April. John Zaruba Jr, K2ZA presented Yaesu System Fusion and Wires-X. John covered the basic differences between these modes and other modes like analog FM communication, Icom’s D-STAR, and DMR radios. He broadly covered Pi-Star and other hotspots, which will be a topic of the June Tech Saturday.
Tech Saturday provides the opportunity for more personal transfer of ideas and actual hands-on use of the technology being presented.
Upcoming Tech Saturday sessions will cover :
- May 6, 2023 : CHIRP Radio Programming Software
- June 10, 2023 : Pi-Star Hotspot Construction and Use
- August 5, 2023 : Tony Starr, K3TS - A show-and-tell session of mobile radio installations following up on presentation at the August 2, 2023 General Membership Meeting
DMR On Tech Saturday - March 4, 2023
Successful Tech Saturday events continued in March as Len Rust, W2LJR gave an excellent session on digital mobile radios (DMR). More than 20 participants listened as Len explained DMR radios were adapted from commercial radios and have many characteristics of those radios (standardized programming with little user input from the radio, efficient communication, Internet routing, etc.). Len presented background information on DMR radios and then describe their use in amateur radio. He also showed their interaction with “hotspots” that can extend a radio conversation through the Internet to another hotspot somewhere in the world. This allows DMR users to work “DX” from virtually anywhere. While not useful for emergency communications because of the reliance on the Internet, DMR offers an interesting opportunity for hams to explore yet another radio medium.
The April 8, 2023 Tech Saturday Forum will cover Yaesu System Fusion and Wires-X presented by John Zaruba Jr, K2ZA.
DMR Configuration Sequence
1. Obtain and Configure DMR ID 2. Download Contact List 3. Identify Repeater or Hotspot 4. Define Talk Groups
5. Create Channel
7. Add Channels to Zones
8. Configure Features
9. Upload Code Plug
10. Upload Contact List
1. Obtain and Configure DMR ID 2. Download Contact List 3. Identify Repeater or Hotspot 4. Define Talk Groups
- Numerical ID
- Text Name
5. Create Channel
- Select Number
- Assign Name
- Select DMR ID
- Assign Frequency
- Transmit
- Receive
- Bandwidth
- Power
- DMR Mode (Simplex/Repeater)
- TX Permit (Channel Free)
- Assign Talk Group
- Assign Color Code
- Agreed Upon with Other Users
- Assign Time Slot
- Agreed Upon with Other Users
7. Add Channels to Zones
8. Configure Features
9. Upload Code Plug
10. Upload Contact List
“Get Stuff Done” Saturday, February 18, 2023
By Jon Pearce, WB2MNF
Tech Saturday, the first Saturday following the General Membership Meeting, is designated for group training sessions and technical discussions, but many other Saturdays are used for various Club projects. In particular, Saturday February 18th was a “get stuff done” Saturday in which a team of Clubhouse regulars and others plowed through several useful projects. This session followed up the previous two weeks’ Saturday workdays erecting the 160 meter antenna, making February one of the most productive months in recent Club memory.
WinLink® on 220 MHz
The first of the two projects was to add a 220 MHz radio, sound card, and programming to the WinLink® station. This new capability was added primarily because a 220 radio had been donated by Cooper Health System, and we wanted to implement it to start building a network out on that band. That frequency is particularly useful in a hospital setting because it apparently has fewer conflicts with hospital equipment than other ham frequencies.
After viewing the flimsy table on which the WinLink® station was located we made a quick decision that it needed to be moved to a sturdier location. Mike KG4JYA had come down to the Clubhouse that morning to see what was going on and to help out on any active projects and was quickly recruited to help clean off the shelving area next to the closet, relocate the building materials into the VHF room, and disassemble the WinLink® station. Mike, Chris AD2CS and I moved the three radios, three sound cards and the computer onto the shelves, placing the UPS and power supply on the desktop. We hooked everything up and tested it on 2 meters and HF and everything was working properly.
The next step was to get the new Masters Communication DRA-45 sound card hooked up for the 220 radio. To the computer this device looked identical to the DRA-50 box that was connected to the 2 meter rig, so we had to figure out which one was which and name them in Windows so we could connect the proper copies of VARA-FM and Sound modem to the correct sound device, which was connected to the respective radio. Karl W2KBF brought down his computer, SignaLink and multiband HT and sat at the Clubhouse table slowly working through packet and VARA modes on each of the 220 MHz and 2 meter bands. It took about five or six tries but we finally got the correct sound card, keying port, and radio combinations worked out and verified that both packet and VARA-FM worked on both the two meter and 220 MHz frequencies.
One small glitch in our planning became apparent when we realized that the multiband antenna currently in use for two meters did not cover the 220 MHz band. This necessitated a quick trip to Ham Radio Outlet on Friday to pick up a CX-333 multi band vertical covering 2 meters, 220 MHz and 70 centimeters. Al KB2AYU and Frank N3PUU got that mounted on the tower later in the afternoon, so we're completely operational on those bands with a brand new antenna. At this point W2MMD-3 is on 2 meters at 145.03 MHz, and W2MMD-4 is on to 223.580 MHz. If you have the ability to operate on these frequencies, particularly on 220, please check them out.
EchoLink® Migration
The second project of the day was to migrate the EchoLink® station from the ancient PC (It's so old (How old is it, Jon) that it uses PS2 connectors for the keyboard and mouse) to a mini PC the size of a paperback book. (The old PC had a tag noting that it was a “Pentium 4 2.0 GHz with 1.5 GB of RAM and the 32-bit installation of Windows 7”.) The new PC had initially been used for WinLink® but wasn't up to the task and had been replaced by a more powerful PC, hence it was now available for EchoLink®.
We had previously wiped and reinstalled Windows and installed the basic EchoLink® software but couldn't go any further because we didn't have the sound card and PTT keying circuitry that was part of the EchoLink® system. In addition, multiple EchoLink® stations with the same identifier cannot be operational simultaneously, so we had to shut down the old EchoLink® PC before installing the new one. Once that was done we removed the sound card and serial port used for PTT switching from the old PC (we had to scrounge up a USB to serial adapter) and install it on the new one. We then had to configure all of the settings on the new PC, which John K2QA had thoughtfully printed out.
Once that was done it was time for some testing. I didn't have EchoLink® installed on my phone and Chris had some issues getting his to work so we really couldn't do final testing from the Clubhouse at that point. Later in the day Frank N3PUU was able to verify that EchoLink® was apparently working properly.
The EchoLink® station is currently located at the west end of the Clubhouse connected to a J-Pole antenna at that corner. Ultimately we plan to move it to the east end, closer to the repeater site, and connect it to a small Yagi antenna pointed directly at the repeater. That will allow to run lower power and should create a more secure connection to the repeater.
A Great Tech Saturday! - February 4, 2023
By Jon Pearce, WB2MNF
The GCARC’s theme for 2023 is “Learning Stuff. Building Stuff. Doing Stuff. TOGETHER!”, and that motto was exemplified at the February Tech Saturday session. Since the satellite station has now been temporarily set up we started out viewing some early satellite passes pointing out some of the differences between satellite and terrestrial operation (satellite footprints, tracking, Doppler shift, etc.) and listening to our signal on the downlink. Later in the morning we heard a high-elevation pass of the International Space Station and listened to the QSOs on the ISS repeater.
Once the satellite passes were over we started the session covering the use of the Flex 3000 transceiver recently installed in the HF room and the PowerSDR software that runs on a PC. We covered basic operation, interfacing to external programs such as WSJT and setting up the virtual COM and audio cables to connect these programs. Sheldon K2MEN and Jim N2GXJ were there to pass along their knowledge of Flex operation, and John W2HUV assisted in explaining the functionality of FT8 operation. Twenty-two members attended various parts of this session, creating one of the biggest turnouts in recent Tech Saturday history. Several participants quipped that we'll soon need a bigger Clubhouse.
Once the presentations were completed many participants moved into the HF room to operate the radio, or to participate in informal conversations. These discussions are a major benefit of the in-person participation, and often lead to additional collaboration on projects outside of Tech Saturday.
As attendance dwindled down to the usual Saturday technical team Jim N2GXJ started a discussion about the possibility of adding a 160 meter antenna to the Clubhouse HF station in time to work the CQ 160 meter contest later this month. This prompted an intense discussion of various types of 160 meter antennas with Frank N3PUU drawing and measuring various alternatives on a Google map of the Clubhouse property. Tony K3TS (the only participant who had actually used such an antenna) ultimately recommended a triangle-shaped antenna extending between the two towers and down to the trees along the road, which seems the most implementable solution. The discussion then moved to the type of balun that would be necessary to match the feedline to the antenna, which would require computer modeling of that particular antenna.
At that point Jim and Chris AD2CS got together with Jim's modeling software and started building a model of that antenna, which ultimately identified the proper balun. Chris provided a spool of antenna wire, the balun was ordered, and if weather permits the antenna should be installed in time for the contest. A great example of team collaboration on a project!
Following the 160 meter antenna discussion the technical team took on the planning process for the VHF tower. Identifying antenna placement on the tower mast is critical for modeling the wind load on the tower, so the team evaluated various antenna configurations that would minimize interference among the antennas. The end result was a tentative plan for antenna placement that can be used to assure that the tower is sufficient for the planned wind load.
For some of us it was a long day at the Clubhouse but the satisfaction of covering two discussion topics, promoting multiple informal discussions, and collaborating on two significant new Clubhouse resources, all of which showed the strength of the membership of this Club.
We Learn, Build, and Do Stuff - Together!
Tech Saturday Forum : January 07, 2023
Tech Saturday Forum - January 7, 2023 - Happy 8th Anniversary
By Jon Pearce, WB2MNF
Troubleshooting with an Oscilloscope with Chris Prioli AD2CS
Another successful Tech Saturday Forum took place on January 7, 2023 as Chris Prioli AD2CS led an interactive training session on the proper use of modern oscilloscopes. Using the Siglent scope from the repair bench as an example Chris covered the basics of scope use, how to take measurements of signals from a scope, the use and calibration of test probes and how to use a scope to troubleshoot a non-functioning piece of equipment. Attendance was slightly lower than in previous months with about 16 members viewing at various points, but the smaller group facilitated greater individual involvement in the session.
Other members used different parts of the Clubhouse for meeting and discussions during the event. Sheldon Parker K2MEN and Jim Wright N2GXJ got together in the HF room to discuss their upcoming presentation at the February 1st General Membership Meeting, and Jim also used the test bench to build out a USB-connected foot switch for use with his Flex HF radio. Meanwhile Karl Frank W2KBF and I followed up on several issues related to Winlink and other emergency communications issues.
A fascinating ad-hoc discussion arose when Jerry Barnish K2EAB and Mike Thompson KG4JYA realized that they were both heavily interested in radio astronomy and proceeded to compare notes and make plans for building out capabilities for further research together. A great example of the benefits of the collaboration that’s facilitated by the GCARC and member activities at the Clubhouse.
The ARRL RTTY contest started at 1 PM and Courtney Smith KD2SPJ came down to the Clubhouse to make some RTTY contexts. RTTY has been largely absent from the ham bands over the past few weeks but it took up the entire digital band area above the FT8 frequencies during the contest as can be seen from the waterfall photo from the Flex radio below. After programming some contest macros in fldigi and setting up the log, Courtney settled in to operate the contest, working stations easily with the great HF equipment.
The next Tech Saturday Forum will be on February 4th, tentatively following up on Jim and Sheldon’s presentation on Flex operation at the General Membership Meeting, and will show how to use the HF room’s Flex 3000 for various types of operation.
Work The ARRL RTTY Contest In January 2023
By Jon Pearce, WB2MNF & Chris Prioli, AD2CS
The ARRL RTTY Contest is scheduled for January 7-8, 2023 and we hope that many Club members will take advantage of this “throwback” operating mode to see what ham digital communications used to be before Joe Taylor started developing the currently-popular modes.
RTTY (RadioTeleTYpe) is the SECOND oldest digital mode in ham radio (the oldest used a combination of long and short transmissions to send coded messages) and lacks many of the features of the current modes like error-correction and speed, so getting a RTTY QSO can be far more challenging than on FT-8.
So if you like challenges - or if you’re into vinyl records, film cameras, or other throwback technologies - get ready to operate that contest! Beginning this year only RTTY will be allowed, so don’t plan to cheat and use FT-8!
HF Station Will Be Operating
The HF station at the Clubhouse will be set up for this contest and will be available for local users to operate, so if you don’t have a home station come on down and operate W2MMD.
January 7, 2023 will also be a Tech Saturday session covering oscilloscope use that day, so there will be lots of ham-related content available.
Tech Saturday Forum : December 10, 2022
Tech Saturday Forum : November 05, 2022
SDR Angel At Tech Saturday
By Jon Pearce, WB2MNF
18 GCARC hams gathered at the Clubhouse on Saturday, November 5, 2022 to review an extensive program for software defined radios called SDR Angel. This program contains a large number of demodulators for various protocols such as packet, APRS, AIS, and ADS-B along with more advanced protocols such as radio astronomy and the new M17 open source digital protocol under development. For SDR radios having transmit capability such as the Hack-RF radio the program also offers transmit modules. This allowed us to set up a transmit station for M17 and packet on one computer and receive it on another, both computers running SDR Angel.
We were also able to use the mapping functionality to map and track ships in the Delaware River and also planes in flight. While SDR Angel is far too complex to learn in one sitting, the session provided enough background information for many of us to continue to explore its capabilities on our own.
Here is the download link for the SDR Angel software : http://bit.ly/3guXxiy
The goal of Tech Saturday events is to bring together hams with various levels of experience and expertise on a particular issue and to allow everyone to contribute that expertise for the benefit of the overall group. Previous Tech Saturday events have focused on topics like Nano-VNA test equipment.
The December 10, 2022 Tech Saturday will focus on 3D printing and design software.
Open Saturday : October 29, 2022
Tech Saturday Forum Field Trip To The RCA Heritage Program Museum : October 08, 2022
One Saturday Morning…
By Chris Prioli, AD2CS
On a recent Saturday morning, the new test and repair bench at the W2MMD Clubhouse got some use by a relative novice at cable assembly. It all started the night before, when Alex Rodriguez KE2AAK, a relatively new Club member and student in the Amateur Extra class, happened to mention that he needed to make up a couple of coaxial cables from the supplies that he had purchased. I suggested that he come in the next morning, a Saturday, and assemble his cables at the Clubhouse.
Alex had ordered about a hundred feet of RG-213U coaxial cable and a set of twenty-four crimp/solder PL-259 connectors from DX Engineering (DXE). He had little or no experience in assembling these cables, but using the tools and equipment available on the Clubhouse test and repair bench, he was able to successfully assemble his coaxial cables under my direction. Also participating for the learning experience was Earl Moore KC2NCH.
Among the tools on the bench are a DXE coaxial cable gripper and a DXE coaxial cable stripper, both appropriately sized for the RG-213U cable, as well as cable cutting pliers and cable trimmer pliers. Of course, the tool complement also includes a DXE coaxial cable crimper with the die set for the RG-8U and RG-213U cables. The final piece of equipment necessary was the solder station, useful for soldering the PL-259 center pins.
With all of the needed tools and equipment on hand, we set out to teach Alex and Earl how to install the PL-259 connectors to the cable. The DXE cable gripper and stripper make short work of preparing the cable, stripping exactly the correct length of outer jacket, shield braid, and dielectric in two easy steps. Step one is to insert the cable into the “slicing” end of the stripper, and then squeezing the stripper closed while rotating it around the cable a couple of turns… until the sound of cutting cable ceases. Step two is to open the stripper tool and reverse it end-for-end on the cable, placing the cable into the “slitting” end of the tool. Then, while squeezing the stripper tool tightly closed and holding the cable securely with your other hand, simply pull the stripper tool straight off the end of the cable, taking the proper lengths of insulation, braid, and dielectric off cleanly.
With the cable end prepared, it is a simple matter to install the connector. Start by slipping the connector nut onto the cable, closed end first. Next, slip a connector ferrule onto the cable, and then peel off the remaining strip of outer jacket left behind by the stripper tool. This strip of jacket will already be slit and will come off very easily. Continue by slipping the connector body onto the end of the cable, inserting the center conductor into the connector pin and working the connector body tube under the exposed shield braid, pushing it gently as far as it will go to bring it up against the cable body. Note… DO NOT twist the connector into place, as doing so can cut the shield braid wires. Push the ferrule up along the cable to the connector body, slipping it up and over the shield braid. Then, using the appropriate crimping tool with the proper die set installed, crimp the ferrule tightly to the cable and connector body. Finish the installation by soldering the center pin to the center conductor of the coax, working inside the center pin tube only, being careful to avoid getting any solder onto the outside of the center pin. Clean off any rosin on the outside of the center pin for best connectivity and a professional finish. Repeat the process on the opposite end of the cable, and then check the cable for continuity and shorts with an ohmmeter. A properly assembled cable will show a direct connection from center pin to center pin, and no connection from the center pin to the connector body or shell.
Alex and Earl each installed a couple of connectors, including soldering the center pins using the Yihua 948-II solder station on the test and repair bench. The cables tested out correctly when measured using the Greenlee DM-510A handheld DVOM, also on the test and repair bench. Are we sensing a theme here yet? Let me spell it out… with the cable and connectors supplied by Alex, everything else needed to assemble the coaxial cables is available right there in the Clubhouse for all members to use! All that we ask is that you get “Elmered” on the tools and equipment if you are not already well experienced with them, both for your own safety and to prolong the service life of the tools and equipment.
The story is not over yet. Alex also had brought with him a power cable for his home radio, consisting of separate red and black wires about twelve feet long each with a four-pin Molex® plug at one end, and a pair of fuse holders near the opposite end, which had about an inch of insulation removed from each wire to accommodate being wrapped around the power output studs on his power supply. His power supply, however, also has Anderson Powerpole® connections available, which is what Alex really wanted to use. To that end, he had purchased a small quantity of 30 ampere rated Powerpole® terminals and some connector bodies.
We improved his power cable by taking out about six feet or so of length and installing the Powerpole® termination that he wanted. Of course, Alex had provided the connector supplies, not knowing that the necessary parts are stocked on the test and repair bench. Equally important, however, is the fact that the test and repair bench is also equipped with a proper Powerpole® crimper tool, which was needed to install his connectors.
We used some large-diameter heat shrink tube pieces to tie the red and black wires together at several points along their length. We also spliced the wires where we had cut out the excess length, properly soldering the splices and covering them with heat shrink tube as well. Shrinking the heat shrink tube sections was a breeze, literally, using the hot air supplied by the hot air reflow wand on the solder station. The heat shrink tube lengths are stocked on the test and repair bench.
The point of all of this is that this bench is really and truly well-equipped and supplied with the most common consumables used in our hobby. Come on out to the Clubhouse and check it out - and plan on using it for your next upgrade, repair, or modification task. After all… it belongs to all of us!
Tech Saturday Forum : August 6, 2022
NanoVNA Tech Saturday was a Success
By Jon Pearce, WB2MNF
More than 15 hams attended the NanoVNA Workshop at the Tech Saturday event at the W2MMD Clubhouse on August 6, 2022. Many of the attendees had already purchased and worked with those devices; others were in their early stages of learning and were able to pick up some ideas and tips. Chris AD2CS and Jon WB2MNF reviewed the basic function and setup of the devices and then started working through some antenna measurements. They showed how to trim a 70 cm antenna to frequency using the VNA to continually measure the SWR at the desired frequency as the antenna was shortened, and then evaluated several other types of antennas including the 2 meter vertical that Charlie Olinda, N2SRQ had brought. A collaborative effort among the attendees was successful in using the VNA to measure the length of an “unknown” piece of coax, and then the group reviewed the effect of various circuits on a “demo” board built to show off how various electrical circuits can be viewed on these devices. Finally Chris demonstrated the VNA Saver program that runs on a PC connected to the VNA and displays the VNA output on a larger screen.
Tech Saturday sessions are held at the W2MMD Clubhouse on the first Saturday of the month following the Wednesday Night General Membership Meeting and are designed to be hands-on collaborative events focused on using the Clubhouse resources to demonstrate various aspects of Amateur Radio and related technical areas. Previous sessions have covered USB software-defined radios, Raspberry Pi and Arduino devices, satellite operations and other similar topics.
The September Tech Saturday event will be held on September 10, 2022 (the day before the GCARC Hamfest) and will cover implementing VARA-FM and packet radio in Winlink and other applications on 2 meters.
The September Tech Saturday event will be held on September 10, 2022 (the day before the GCARC Hamfest) and will cover implementing VARA-FM and packet radio in Winlink and other applications on 2 meters.
Satellite/VHF Room Grounding Project - April 9, 2022
We had some pretty heavy turnout for the April 9, 2022 Tech Saturday Forum. While no specific program was offered, we none the less brought out the membership to see first-hand the work being done in the Satellite/VHF room at the west end of the building.
Sheldon Parker K2MEN took advantage of the fair weather to weed-whack around the building. A big THANK YOU to him for that!
Bill Mollenhauer N2FZ came in as a guest of Jerry Milden K2OOO, and dropped off his membership application while he was there!

April 2022 Tech Saturday Forum - clockwise around the room, starting at the near left, is Lenny W2LJR, Mike K2MRP, Jon WB2MNF, Ron NR2B, Frank N3PUU, (unidentified), John K2QA, Al KB2AYU, John K2ZA, Carl KD2YIF, Bill N2FZ, and Jerry K2OOO. Photo taken by Chris AD2CS. Other members were present, but did not make it into the photos, including Charlie N2SRQ, John W2HUV and Sheldon K2MEN.
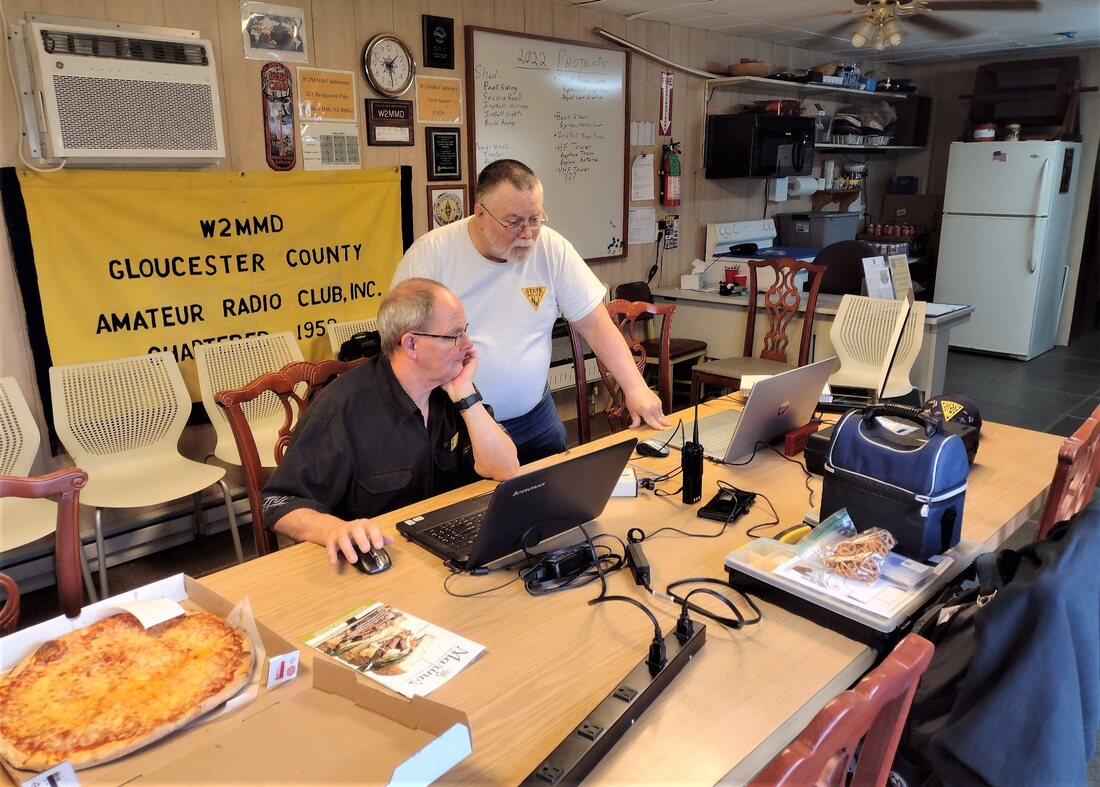
AD2CS & KD2YIF - Seen at the January 8, 2022 Tech Saturday - Members helping other members at the Clubhouse.
Tech Saturday Is For You!
By Jon Pearce, WB2MNF
The GCARC Tech Saturday event occurs on the first Saturday following the first Wednesday (the day of the GCARC General Membership Meeting) every month. Its purpose is to provide a forum for hams to discuss technical issues with other hams and to teach and learn about ham radio. It also provides the opportunity for GCARC members to become familiar with the many resources available at the Clubhouse and to get credentialed to gain entry to the Clubhouse and use those resources.
The November Tech Saturday event was a great success in achieving those goals with more than a dozen GCARC members attended at various times. Small groups worked together to program Baofeng and DMR radios or to figure out the best implementation of FT8. John Hill, W2HUV, showed off the HF station and described its remote operation, and several visitors got to work some great satellite passes and see some of the SkunkWorks resources in the VHF room. There was no discussion of personal medical ailments or expositions by the Heroes of Yesteryear about their accomplishments during the Eisenhower administration that have occasionally occurred in the past - instead it was lots of hams helping hams with technical issues.
The Clubhouse provides a great venue for these meetings, having a wealth of table space with seating and electrical outlets along with test equipment, power supplies and various antenna options. It appeared that many of the discussions were impromptu, although a few attendees had previously arranged to meet to work on specific issues. Even if there’s no planned program (as there wasn’t at this meeting) there was still plenty to do. And if you have a specific issue to discuss bring it along and someone will be there to help.
The next Tech Saturday Forum will be on December 4, 2021. The Clubhouse opens at 9:00am although many arrive somewhat later in the morning. Come on out, bring your questions or expertise and have an interesting morning.
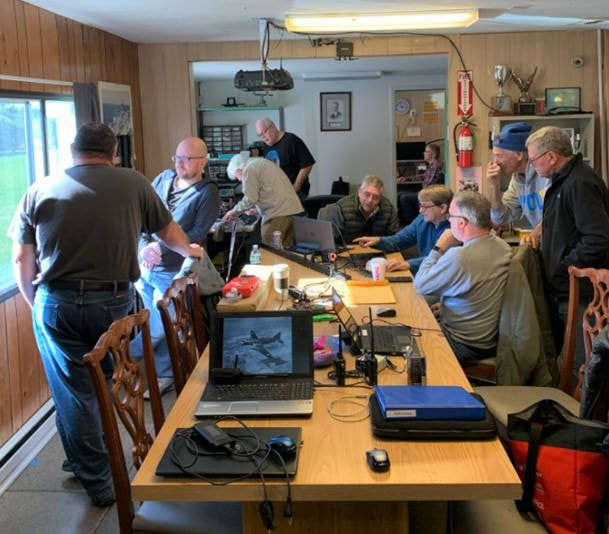
Tech Saturday Forum - November 6, 2021
Tech Saturday, July 7, 2021
Remote HF Station Amplifier and Rotator Installation
Tech Saturday, October 10, 2020
W2MMD SkunkWorks
OK, I've Got My License - Now What???
Tech Saturday, February 8, 2020
Raspberry Pi Hardware/Software Training Class
Tech Saturday, January 11, 2020
RTL-SDR Hardware/Software Training Class
SDR Useful Links
By Jon Pearce, WB2MNF
Virtual Audio Cable : https://vac.muzychenko.net/en/index.htm : This is needed for all of the other programs. There are other similar programs, but this is the one that we know.
MMSSTV SSTV Decoder (free for hams) : https://hamsoft.ca/pages/mmsstv.php
WxToImg Weather Satellite Decoder (free) : https://wxtoimgrestored.xyz : UISS ISS and APRS decoder.
SoundModem Programs : http://users.belgacom.net/hamradio/uiss.htm : Free but donation is requested.
Article on decoding NOAA satellite images using only the RTL-SDR radio and the cheap rabbit-ears dipole in the kit that we recommended. They use different software for the SDR radio and VAC, but the WxToImg program is the same. If you have that kit it’s certainly worth a try. NOAA passes vary in their elevation and consequent signal strength, but the occasional overhead pass can be very clear. Here’s the link : https://hackernoon.com/weather-sat-9620228789c8
John K2QA has set up a page on the Skunkworks website with the handouts and presentations from the January and February Tech Saturday sessions : http://skunkworks.w2mmd.org/tech_Saturday
Tech Saturday, October 6, 2018
Tech Saturday, November 5, 2016
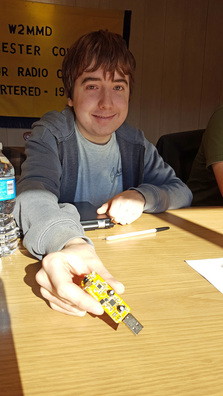
|
Matt N2EEE shows off his VHF/UHF SDR receiver. During Tech Saturday, we hooked it up to the Clubhouse's ALT/AZ satellite antenna, and used it to listen in on amateur satellite conversations in progress during a satellite pass over the W2MMD Clubhouse. |
Tech Saturday Forum - March 5, 2016
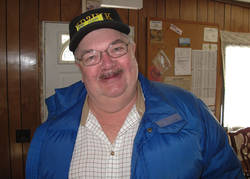 Frank Bratton, KD2HIK
Tech Saturday Forum continues to be a big hit out at our new W2MMD Clubhouse. On the first Saturday after the general membership meeting for March 4, 2015, we had a number of people come out and stop by, at least for a little while, in spite of the cold weather and snow still covering the grounds.
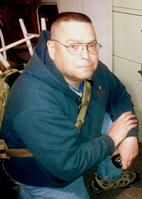 John Zaruba, K2ZA John Zaruba, K2ZA
In the main room, John K2ZA had a chance to show off his Arduino project in process, and have some conversations around D-Star and System Fusion radios that people had brought in.
|
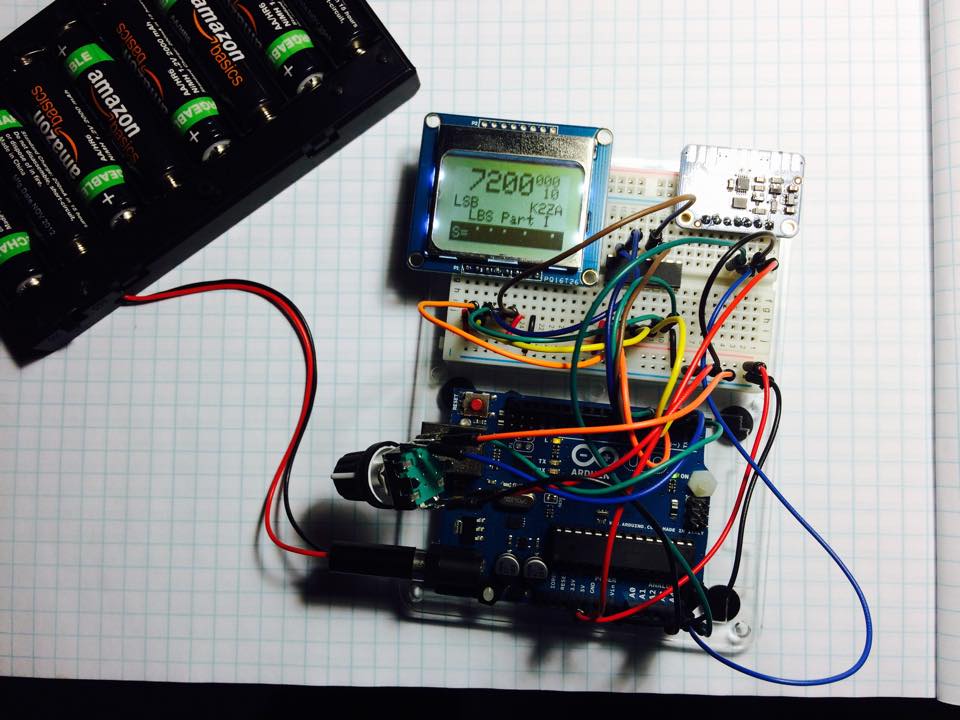
|
 Al Arrison, KB2AYU
In the VHF/UHF room, Al was hunting amateur radio satellites using computer control of the clubhouse’s alt/az antenna, clearly locking in on some voices from one bird during a favorable pass. Maybe next time he’ll make a 2-way contact. Stop on by April 4 to find out!
At the other end of the Clubhouse, in the HF room, the 10 meter band was found to be hopping with lots of stations from Europe in a contest able to be heard. Some of our ‘new to HF’ members got a chance to log some of their first trans-Atlantic radio contacts, with a little help from their fellow Club members. Were you one of them? It’s amazing what one can do with less than 100 Watts. What a great experience!
Even when not behind the microphone, we had fun trying to pick out the callsigns from the sideband signals we were hearing, and looking them up via QRZ.com on our cellphones. Care to give it a try? Thank you again Al for that Wi-Fi, and the internet extension out at the clubhouse. It sure comes in handy!
Jim Wright, N2GXJ
W2MMD Clubhouse
Gloucester County 4-H Fairgrounds
235 Bridgeton Pike (Rt 77)
Mullica Hill, NJ, 08062
GPS Heading : 39.717000, -75.209950
Gloucester County 4-H Fairgrounds
235 Bridgeton Pike (Rt 77)
Mullica Hill, NJ, 08062
GPS Heading : 39.717000, -75.209950